By Renee Long and Tiffany Stout
As a wellness warrior, you’re probably making an effort to incorporate natural products into all areas of your daily life—including fun holiday traditions like dying Easter eggs for decoration or your family’s big Sunday Easter egg hunt.We were really psyched when we read this article from the BigSisLilSis blog on using natural coloring, flowers, and leaves to create beautiful designs on Easter eggs. We decided to spend a Saturday turning Renee’s kitchen into an all natural DIY dye factory to make gorgeous naturally dyed Easter eggs.
If you’re looking for an alternative to the synthetic food dyes often used to color eggs, give these natural dyes a try. It requires a bit of effort and time (the eggs need to sit in the dye overnight), but the beautiful result is totally worth it!
Gather Your Supplies
Make sure you have all the supplies you’ll need before you get started—this will save you time and prevent any unnecessary trips to the corner store in the middle of your DIY project.
Some odds and ends you’ll want on hand…
- A few sets of pantyhose (for wrapping the eggs)
- One or two colanders to strain the dyes
- Mason jars, cups, containers, or bowls to soak your eggs (leave room in your fridge so your eggs can soak in the dyes overnight)
- Medium sized pots to boil some of the dyes
- A recipe. You’ll have a bit of boiled cabbage and beet leftover after making your natural dyes. Tiffany snacked on them while we colored our eggs, but you could plan ahead and make some coleslaw or a salad for an after-DIY dinner!
Ingredients and Directions for Natural Food Dye
Since we’re going all natural here, we recommend buying certified organic products to make your dyes. If you’re making natural dyes, they might as well be free of pesticides and GMOs, right?
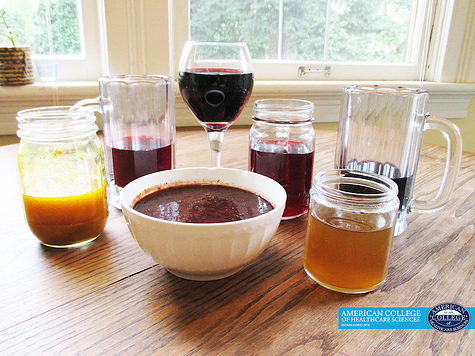
Red cabbage
Color of Easter egg: Deep blue
Directions: Boil ¼ head of cabbage (chopped) in one cup of water. Strain and cool. Add 3 tablespoons of white vinegar.
Beet
Color of Easter egg: Magenta
Directions: Boil 1 medium beet in 1 cup of water. Strain and cool. Add 3 tablespoons of white vinegar.
Grape juice
Color of Easter egg: Light blue
Directions: Add 2 tablespoons of white vinegar to 1 cup of grape juice.
Green tea
Color of Easter egg: Yellow
Directions: Steep 3 tea bags (or 3 tablespoons if you’re using loose leaf) of green tea in 1 cup of water for 15 minutes. Strain and cool. Add 3 tablespoons of white vinegar.
Turmeric powder
Color of Easter egg: Yellow
Directions: Add 1 cup of boiling water to 2 ½ tablespoons of turmeric Curcuma longa powder. Stir well and let cool. Add 3 tablespoons of white vinegar.
Red wine
Color of Easter egg: Dark, rusty red
Directions: Add 2 tablespoons of white vinegar to 1 cup of red wine. (We used a bold red blend to get the strongest staining power. Cabernet and Merlot are also effective.)
Blueberries
Color of Easter egg: Purple
Directions: In a blender, puree 1 cup of blueberries, slowly adding in 1 cup of water. Add 2 tablespoons of white vinegar.
Design Your Naturally Dyed Easter Eggs
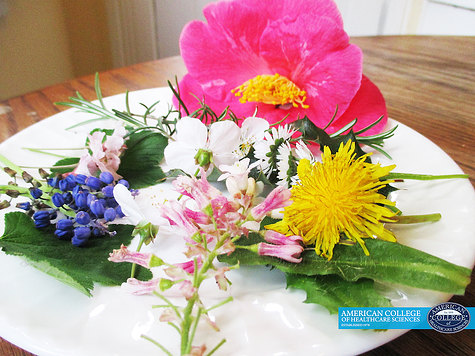
While your dyes are cooling, head outside and gather the supplies for your designs. We’re lucky to live in Portland, Oregon where flowers and funky shaped foliage abound! Of course, you can always opt for stickers or draw designs with wax crayons, but we loved LilSis’s flower method so much, we had to try it ourselves.
Here’s a photo of what we found in Renee’s yard:
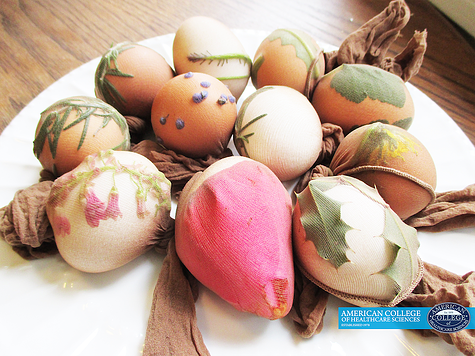
Next, start wrapping your eggs. Cut the pantyhose into three to four inch strips. Place your flower or leaf along your egg, and place into pantyhose, tying off each end. LilSis recommends using twist ties, but we found that just knotting the pantyhose worked fine.
Dye Your Easter Eggs… Naturally!
Now all that’s left is to drop your eggs into the natural dyes. We got the best results from letting our eggs sit in the dyes overnight in the fridge.
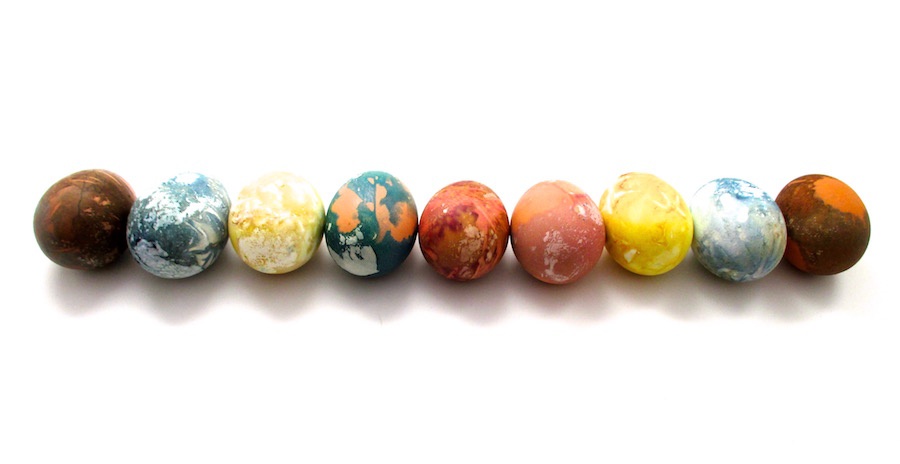
When you’re ready to take your eggs out, just clip the pantyhose, remove the leaf or flower, and let your eggs dry. The blueberry and turmeric dyes were the messiest, so you may want to give those eggs a quick rinse once they come out of the dye. Here's how our DIY naturally dyed Easter eggs turned out:
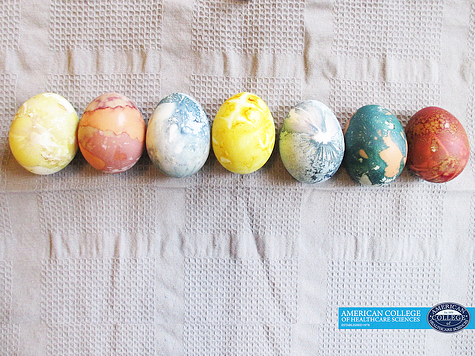
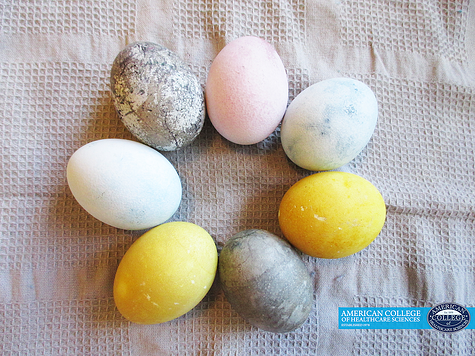
We also colored a few eggs without flowers just to test the dyes, and you can check out those colors in the photo below. So if you’re not into foraging and using pantyhose, the plain-dyed eggs (below) are still really cool : ).
Some Thoughts on the Best DIY Dyes…
Since we tried to go as all natural as possible, we bought free range, certified organic eggs. However, brown eggs, unfortunately, do not produce very vibrant colors. While the natural cabbage and beet dyes were quite beautiful on brown eggs, the rest were a bit dull. So we ended up using a mix of brown and free-range white eggs for this project.
Our favorites: As we mentioned, beet and cabbage created gorgeous colors on the brown eggs, and even more so on the white eggs. Grape juice was another favorite—producing a rich, light blue that made our eggs look like mini Earth globes! We also loved how the red wine seemed to find the veins of the egg and made a stunning gothic, marble-like effect.
Do you have any natural DIY projects planned for this spring? Leave us a note in the comments!
And if you loved this DIY adventure, don’t forget to check out our video on creating fizzing herbal bath bombs!
This article was updated for accuracy on April 14, 2017.
This article is for informational purposes only. It is not intended to treat, diagnose, cure, or prevent disease. This article has not been reviewed by the FDA. Always consult with your primary care physician or naturopathic doctor before making any significant changes to your health and wellness routine.
Disclosure of Material Connection: We are employees for American College of Healthcare Sciences, the Institution that publishes this blog. However, all opinions are our own. This blog may contain affiliate links. We are disclosing this in accordance with the Federal Trade Commission’s 16 CFR, Part 255: “Guides Concerning the Use of Endorsements and Testimonials in Advertising.”

