 Earlier in June, I was lucky enough to help represent ACHS at the Mother Earth News Fair in Albany, Oregon. The weekend was a huge success; our team set up a fantastic display of the wellness products available here at the Apothecary Shoppe, and we met a ton of interesting people passionate about natural health and organic, sustainable farming practices.
Some of the highlights from this show were the many stages showcasing talks of all varieties—from how to make natural fuel for your car to raising healthy chickens to organic body care recipes.
On Sunday, Jessica Kellner, Editor-In-Chief of Mother Earth Living magazine, gave a very insightful talk on the best methods for harvesting and drying your homegrown herbs. Here are a few of my favorite snippets from her talk:
Know the Part of the Plant You Want to Collect
Before you get started, make sure you know which part of the plant to harvest. Jessica didn’t go into too much detail on this subject, but depending on the botanical, you may be harvesting the leaves, the flowers, the seeds, the roots, the rhizomes, or another part of the plant. CIO Erika Yigzaw explains this in depth in this free eBook here: Saving Your Herbal Harvest.
When to Pick Your Herbs
Herbs: Pick your herbs in the morning, after they have a chance to dry some of the accumulated dew from the evening. Pick the herbs before the sun’s heat reaches its peak.
Foliage: Pick when the plant is beginning to form buds.
Flowers: Pick when the blooms have just begun to open.
Think about the point in your plant’s life when it’s generating the most energy; that’s when the plant’s essential oil will be most potent.
 Tips for Drying Herbs
Pictured: ACHS Dean of Admissions Amy Swinehart and me at the Mother Earth News Fair in Albany, Oregon
Here are a few common ways to dry your harvested herbs:
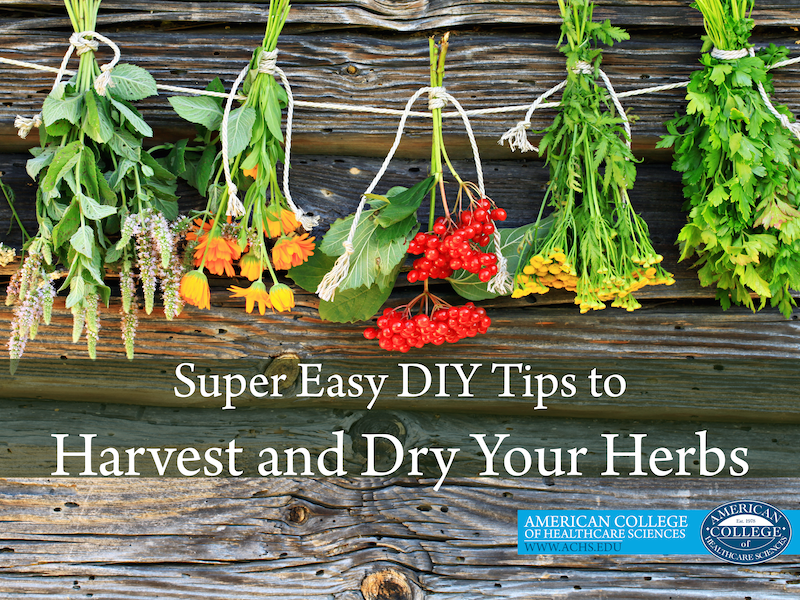
- Bundle. Use this method with “tough” herbs like mint Mentha ×piperita (L.), rosemary Rosmarinus officinalis (L.), sage Salvia officinalis (L.)[1]; the herbs that are hardy and strong. Secure a handful of the stems in a bunch with a rubber band. Jessica stressed the importance of the rubber band, as it will constrict as the herbs dry out. If you use a material like twine, those herbs will likely fall from the knot and end up on the floor! But if you like the rustic look of twine, you can always bundle with the rubber band first and then cover with twine. Hang the bundle in a cool, airy room away from direct sunlight, possibly in a garage or a basement.
- Screen Dry. This is a great way to dry parsley Carum petroselinum (L.) or basil Ocimum basilicum (L.) in large amounts. Take one screen, spread the herbs in one layer, and then add a second screen on top. This second screen is optional but allows for easily flipping of the herbs every couple days, for about a week.
- Freeze. The freezing method is great for preserving herbs, but they tend to lose their texture. This is where the fun begins; you have the ability to get very creative in the freezing process and combine herbs with your plentiful vegetable harvest. Jessica recommended basil O. basilicum + tomato, oregano Origanum vulgare (L.) + squash, a marinara sauce mix, and soup bases in ice-cube trays for easy seasoning of rice dishes. Think to yourself, “How might I use these in future holiday meals, winter soups, etc.?”
My favorite piece of this process was the array of flavored ice cubes you can concoct. Mint M. piperita ice cubes for iced tea, lavender Lavandula angustifolia (Mill.) ice cubes for lemonade, and even pesto cubes (which you can freeze in olive oil) for pasta dishes! Yum!
Want to test if your herbs have actually dried? Try the “Jar Test!” Load your dried herbs into a glass jar, secure a lid on top, and wait to see if any foggy moisture builds. If so, your herbs need a couple more days of drying before they’re crisp and ready for consuming. It’s very important that you completely dry your herbs to avoid bacteria growth.
What are your plans for this year’s harvest? Tell me your tips and ideas in the comments.
Happy Harvesting!

This article is for informational purposes only. It is not intended to treat, diagnose, cure, or prevent disease. This article has not been reviewed by the FDA. Always consult with your primary care physician or naturopathic doctor before making any significant changes to your health and wellness routine.
Disclosure of Material Connection: I am the Production Lead for American College of Healthcare Sciences, the Institution that publishes this blog. However, all opinions are my own. This blog may contain affiliate links. I am disclosing this in accordance with the Federal Trade Commission’s 16 CFR, Part 255: “Guides Concerning the Use of Endorsements and Testimonials in Advertising.”
[1] Note: I’m listing the Latin names for the medicinal varieties of the botanicals in this blog post, but if you’re growing different varieties in your garden, the same harvesting and drying tips should apply.